Create and Design Views
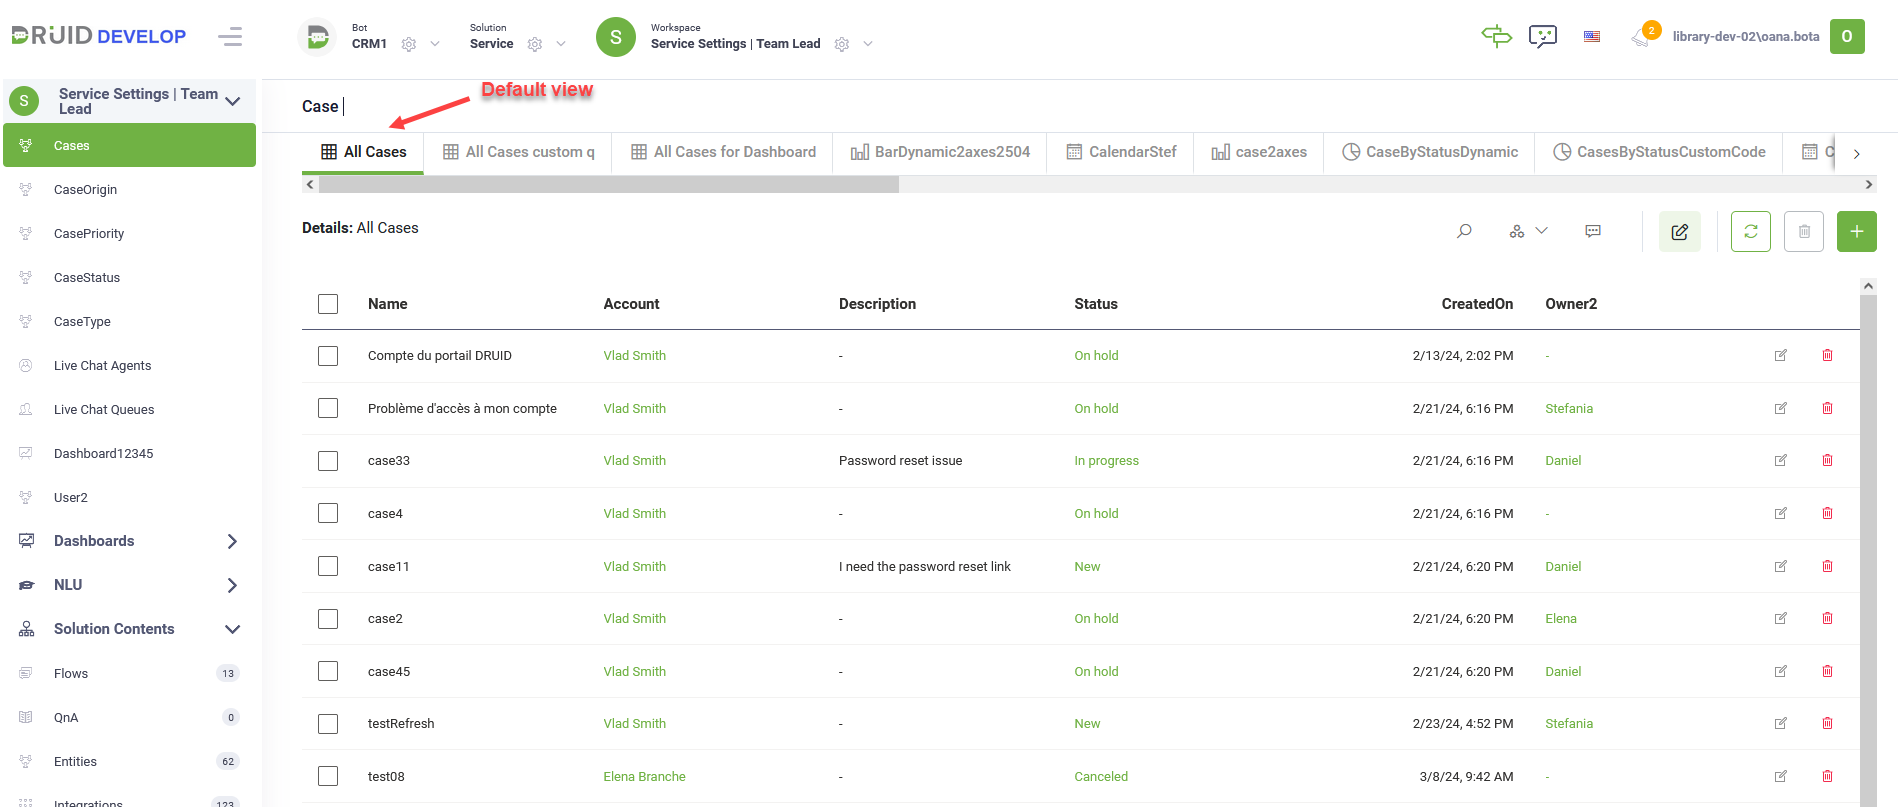
At authoring time, the authors can define multiple views for an entity that will be displayed to the business users as a drop-down selection, but they can set only one as default.
To create a view for an entity, follow these steps:
Step 1. Add view on entity
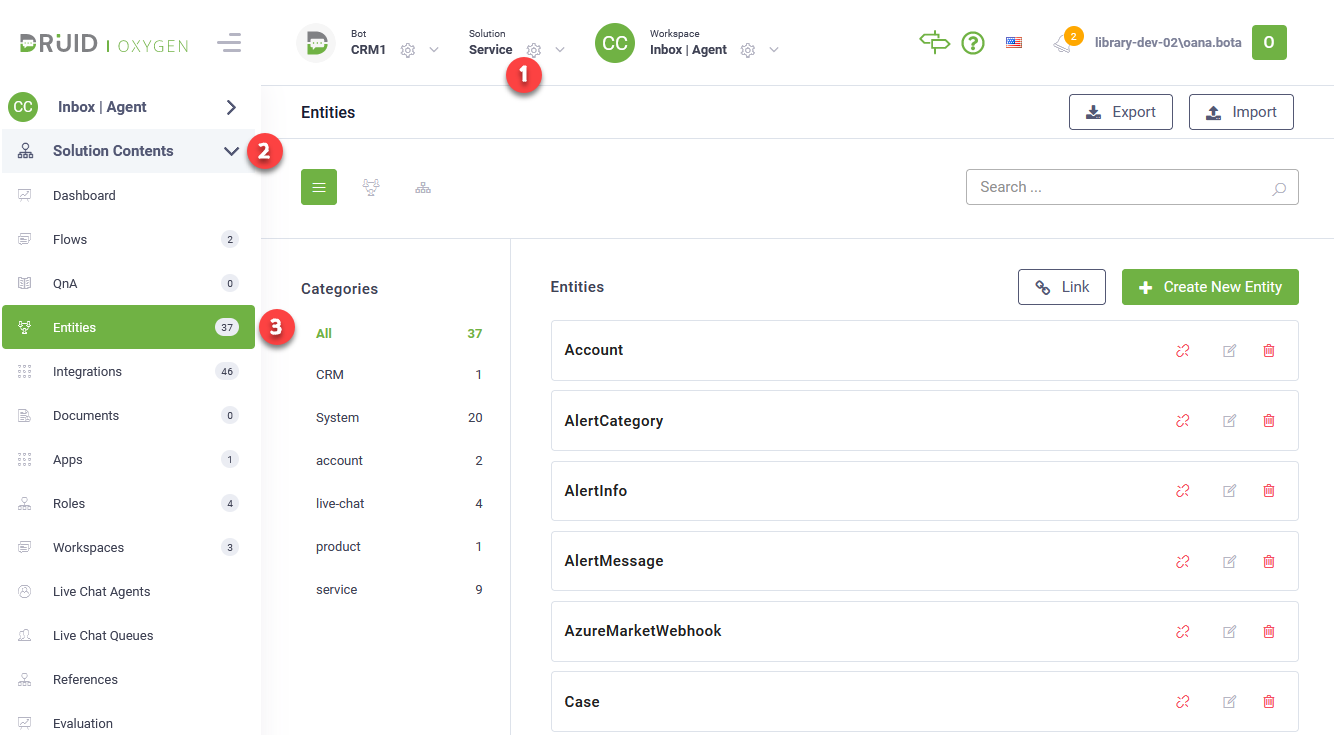
- From the Solution drop-down, select the desired solution and on the Solution Contents menu, click Entities. The page displays the list of entities linked to the current solution.
- Select the entity for which you added a link in the workspace. The entity configuration page appears on the Details tab.
- Click the Views tab. The list of views created for the current entity appears. If there haven’t been defined any views, the page is empty.
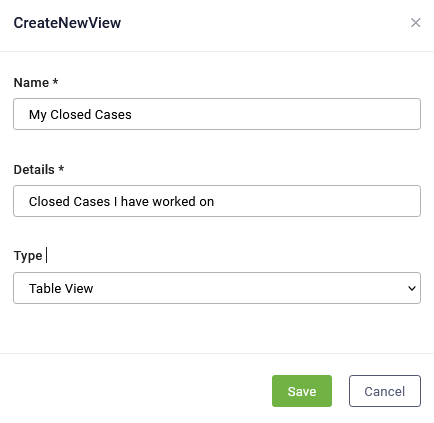
- At the top-right corner of the page, click the CreateNewView button (
 ). The CreateNewView pop-up appears.
- Enter the view name and a brief description. The description will help you easily identify what data the view contains.
- From the Type field, select Table View.
- Click Save.

In DRUID 5.20 and higher, you can create Calendar views to track record events on a calendar. For more information, see Calendar Views.
Step 2. Define the view properties (optional)
On the entity’s views page, click the Edit icon ( ) displayed in line with the view you want to define. The View Designer appears. The right side editor displays by default on the View properties (
 ).
).
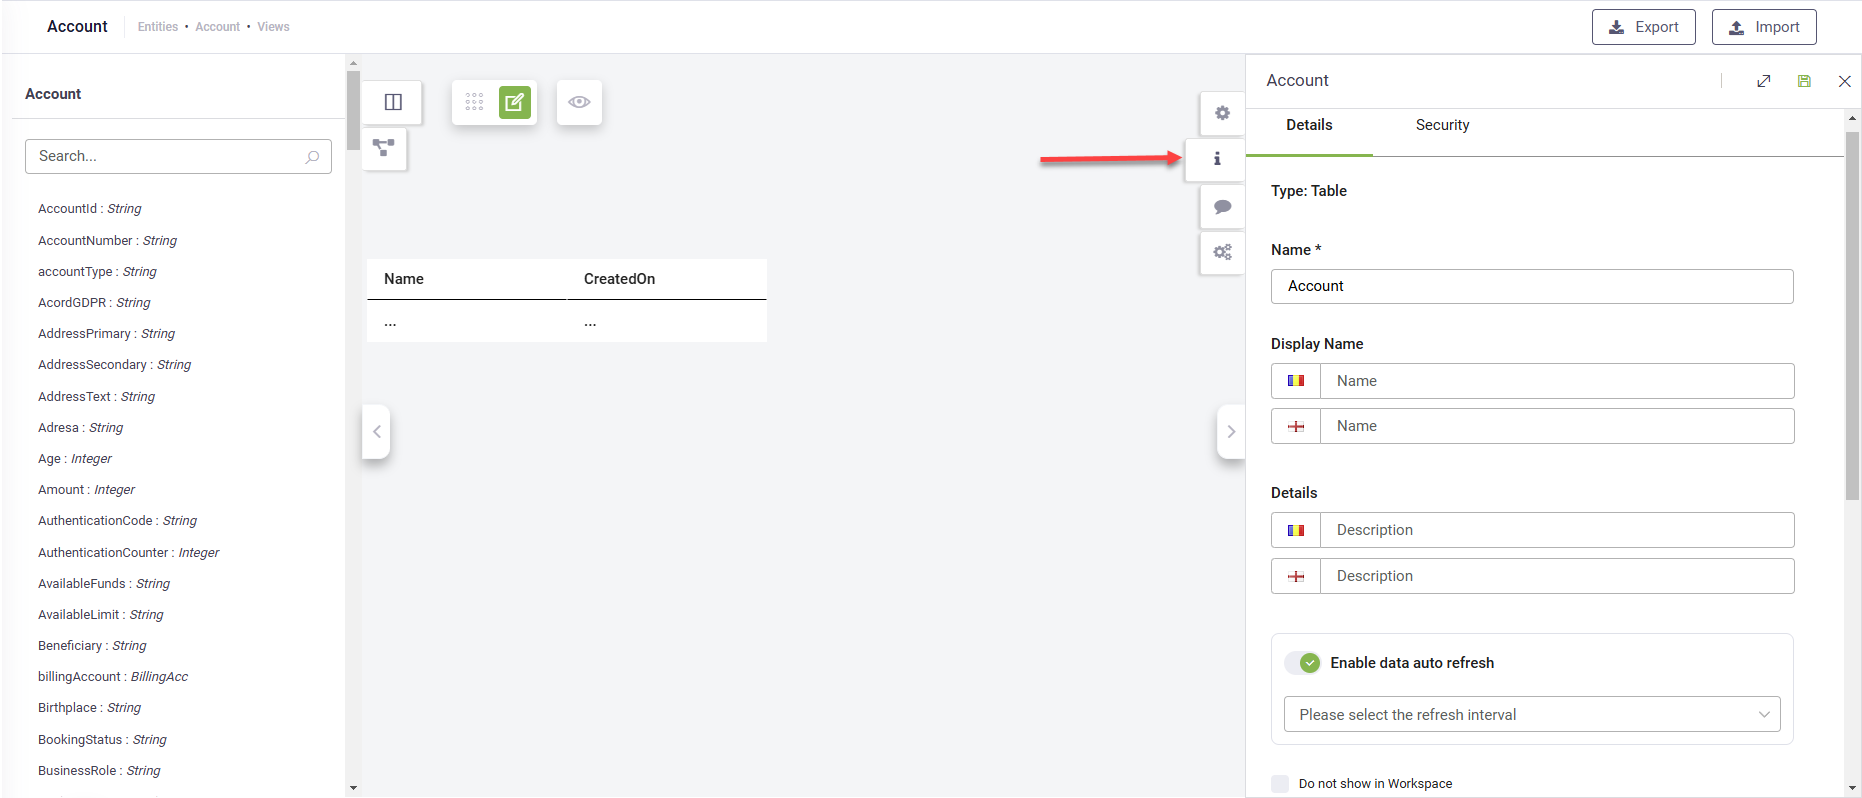
If you create views which contain multi-lingual entity fields, you might want to provide the view name and details in all languages set on the AI Agent. This way, business users accessing the view in a specific language set on the AI Agent will see the view information (both the view name and description) in that language.
If your view receives data from external sources, enable data auto-refresh to ensure real-time updates without manual intervention. Tap Enable data auto-refresh and select the desired refresh interval. This feature is available in DRUID 8.9 and higher.
After you set the view properties, click the Save icon ( ) at the top-right corner of the editor.
Step 3. Define the view columns and their layout
On the entity’s views page, click the Edit icon () displayed in line with the view you want to define. The View Designer appears.
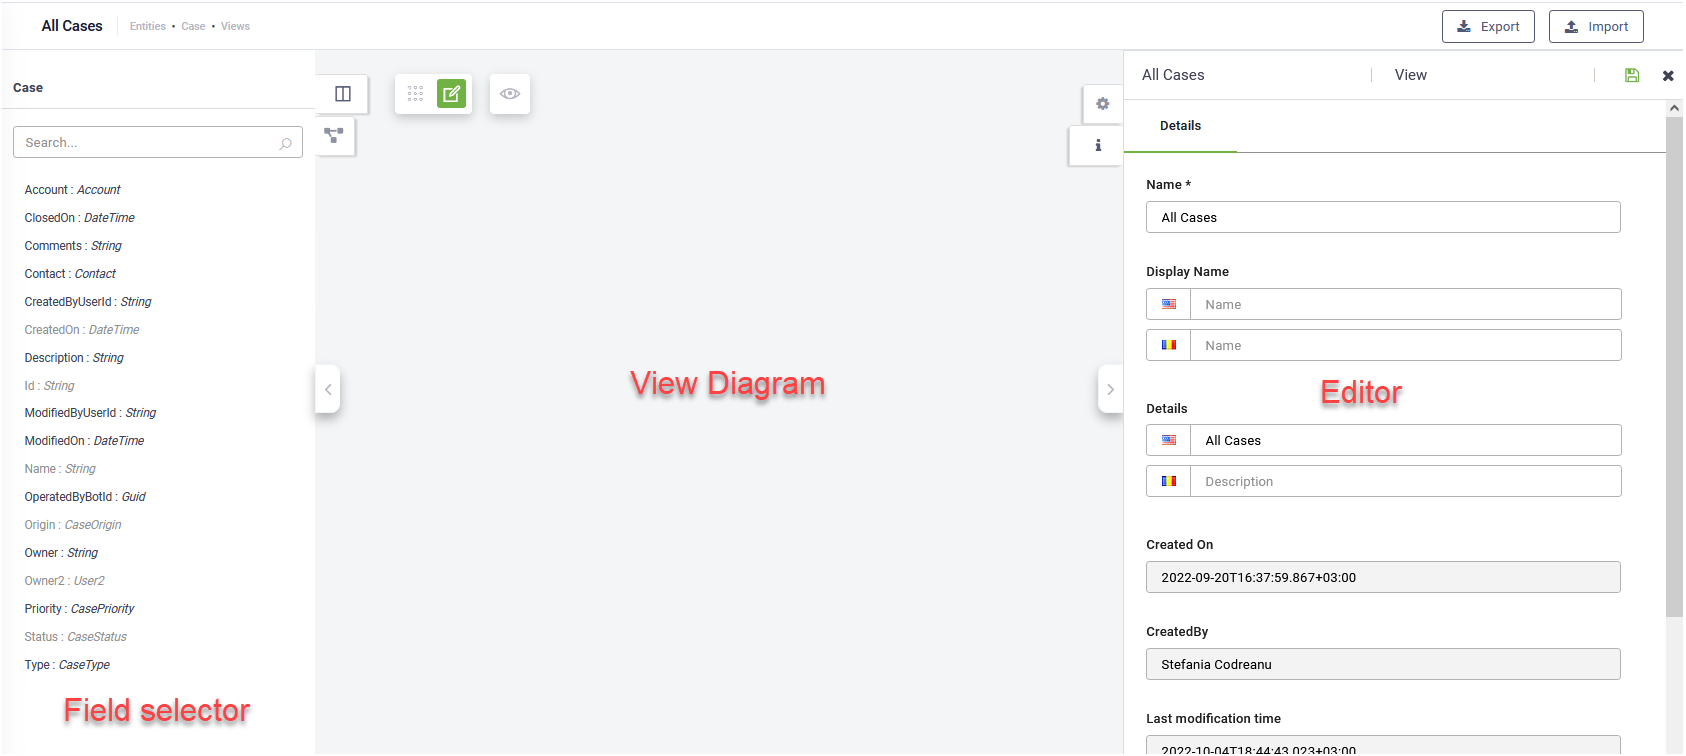
The View Designer is comprised of the following elements:
- Field selector – displays the list of entity fields and relations. By default, it displays the fields of the current entity (
 ).
).
- The View Diagram is the area where you design the view and define its data.
- The View Editor allows you to set the view details and also set the layout of the view columns (when the focus is on a specific view column).

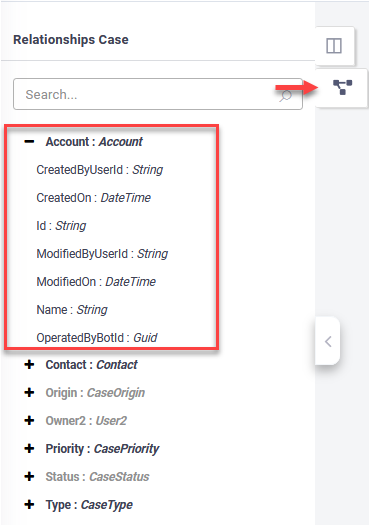
To see the list of entities referenced by fields of type Entity defined on the current entity, click the Relations icon ( ). The list of referenced entities appears. To see an entity’s fields, click the Plus icon (
 ) in front of it.
To define the view columns and their layout:
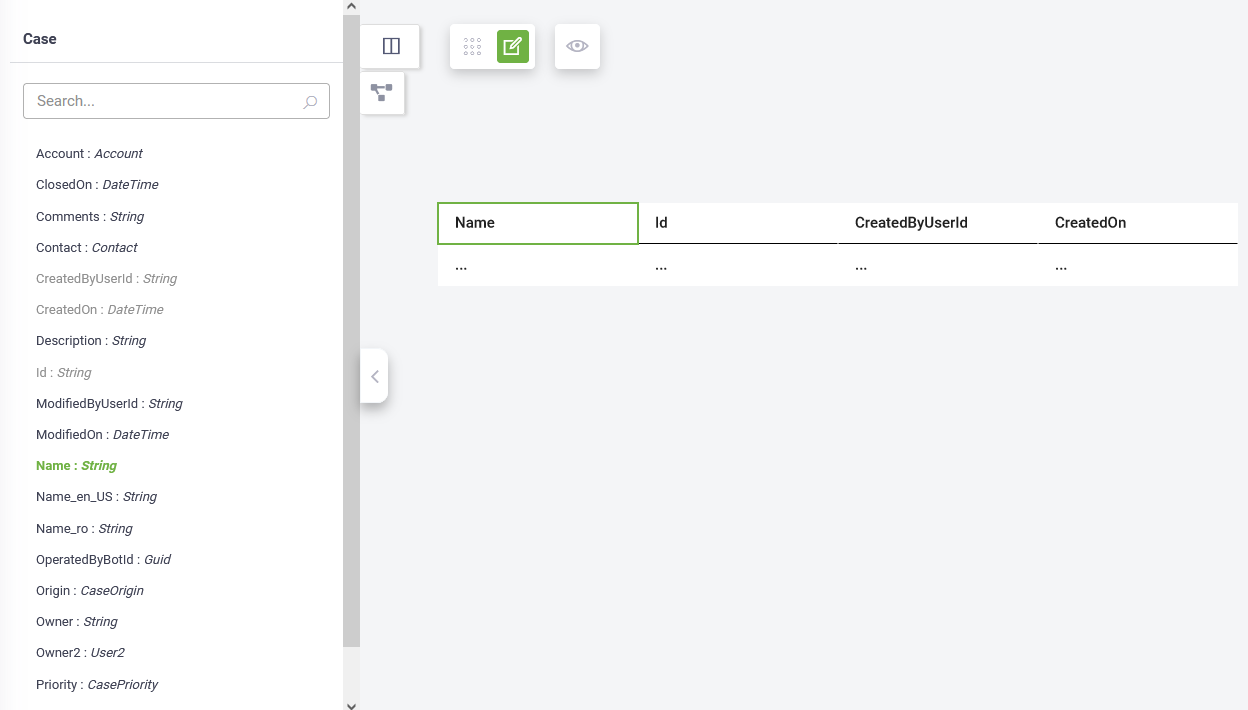
- On the entity fields and relations selector, identify the fields that you want to include as columns in the view and drag and drop them one by one in the View Diagram before the first column. Add as many fields as you need.
- Reorder the view based on your preferences by drag and dropping columns in the view.
- Set the view layout by defining the view settings for each column in the view. By default, the view columns have a fixed width of 200px and are visible on desktop and mobile devices. You can change the column width (selecting from a set of available widths) and / or hide it on mobile devices (hide the column when authors and business users access the views on mobile devices). To do so, click on the desired column in the view and set the column settings to accommodate your needs.
- Set the view Row height. Choose between Small, Medium, or High row height options. The default is Medium.
- Click the save icon () at the top-right corner of the editor to save the column settings.

Now that you defined the view columns, you can populate the view with data by adding integrations on the view.
Step 4. Define view data by adding integrations
Prerequisites
- In the solution for which you want to get an aggregated view on data coming from various data sources, make sure that you defined integrations with external data sources as best suits your needs.
- As a view provides a list of records, make sure that on the integrations tasks you define, the entity for which you will define the views are set as response entity and it is a collection (in the integration task, Response tab, IsResponseCollection is checked).
Once you defined the view, you need to fetch entity data that will be displayed on the view, by adding integrations with external data sources. This way, your view is populated with entity records.
To define the view data follow these steps:
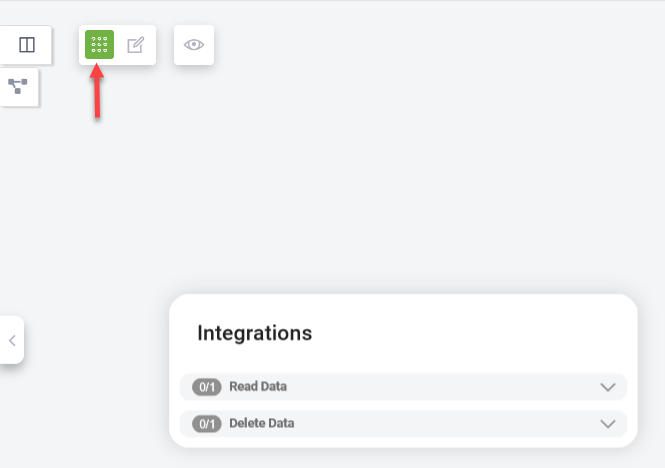
- At the top side of the View Diagram, click the Add Integrations icon (
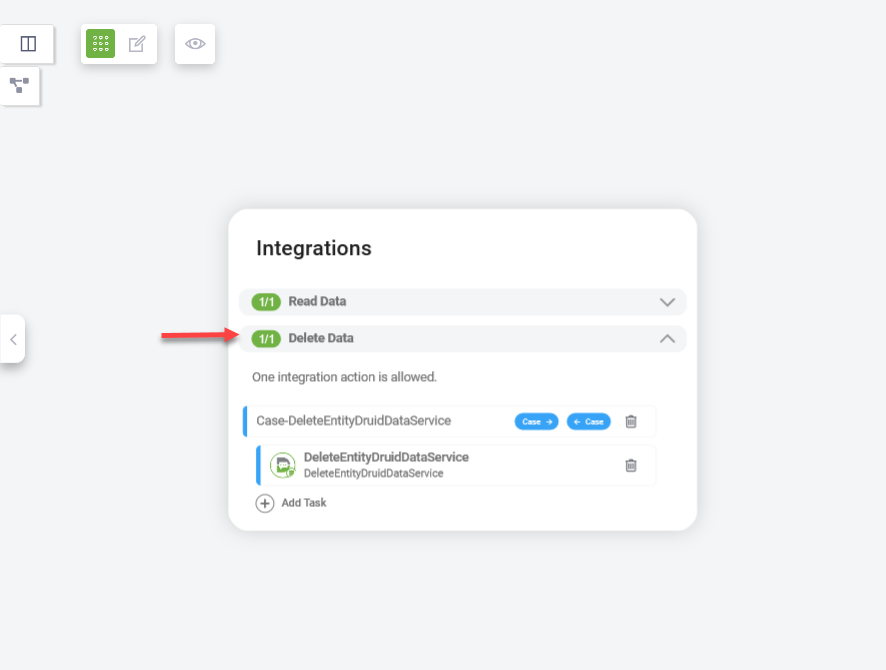
 ). A pop-up appears. The pop-up contains two sections:
- Read Data – allows you to define from which data source DRUID reads data and aggregates it in the view.
- Delete Data – allows you to define what happens when records are deleted from the view.
- Click the Read Data section. The section expands.
- Define the integrations to get the view data.
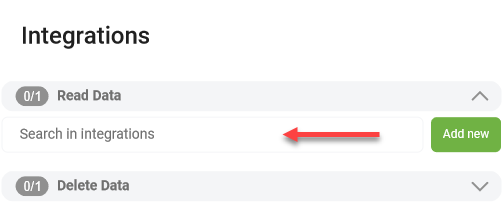
- Add the integration action by using of the two options below:
- Search for an existing integration action defined in the current solution and press Enter on the keyboard.
- Add a new integration action. Click the Add new button (
 ) and define the connector action using the right editor. Make sure to select the current entity as Response entity and select Is Response Collection and Is Active.
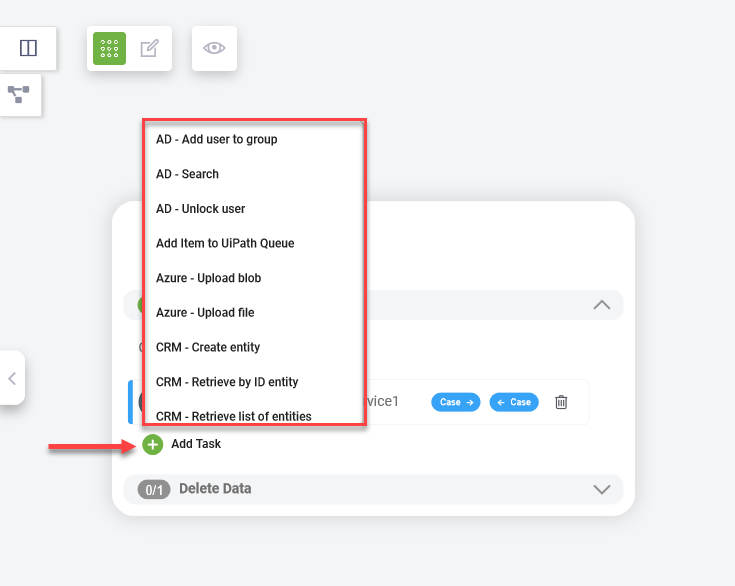
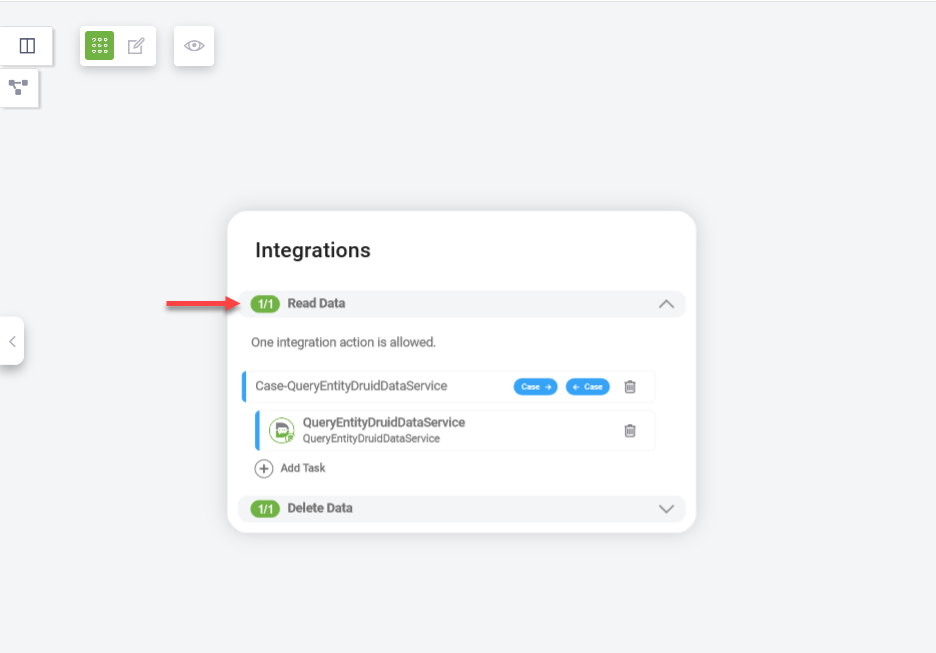
- Add integration tasks. In the Read Data section, click on the Add task icon and select the desired integration task from the list where the current entity is Response entity and Is Response Collection is selected.
- Click the Delete Data and select the desired integration based on what you want to happen when authors and business users will remove records from the view. Save the integration(s).

Save the integration action by clicking the Save icon () at the top-right corner of the editor.
You can now preview the view and make further adjustments if needed.
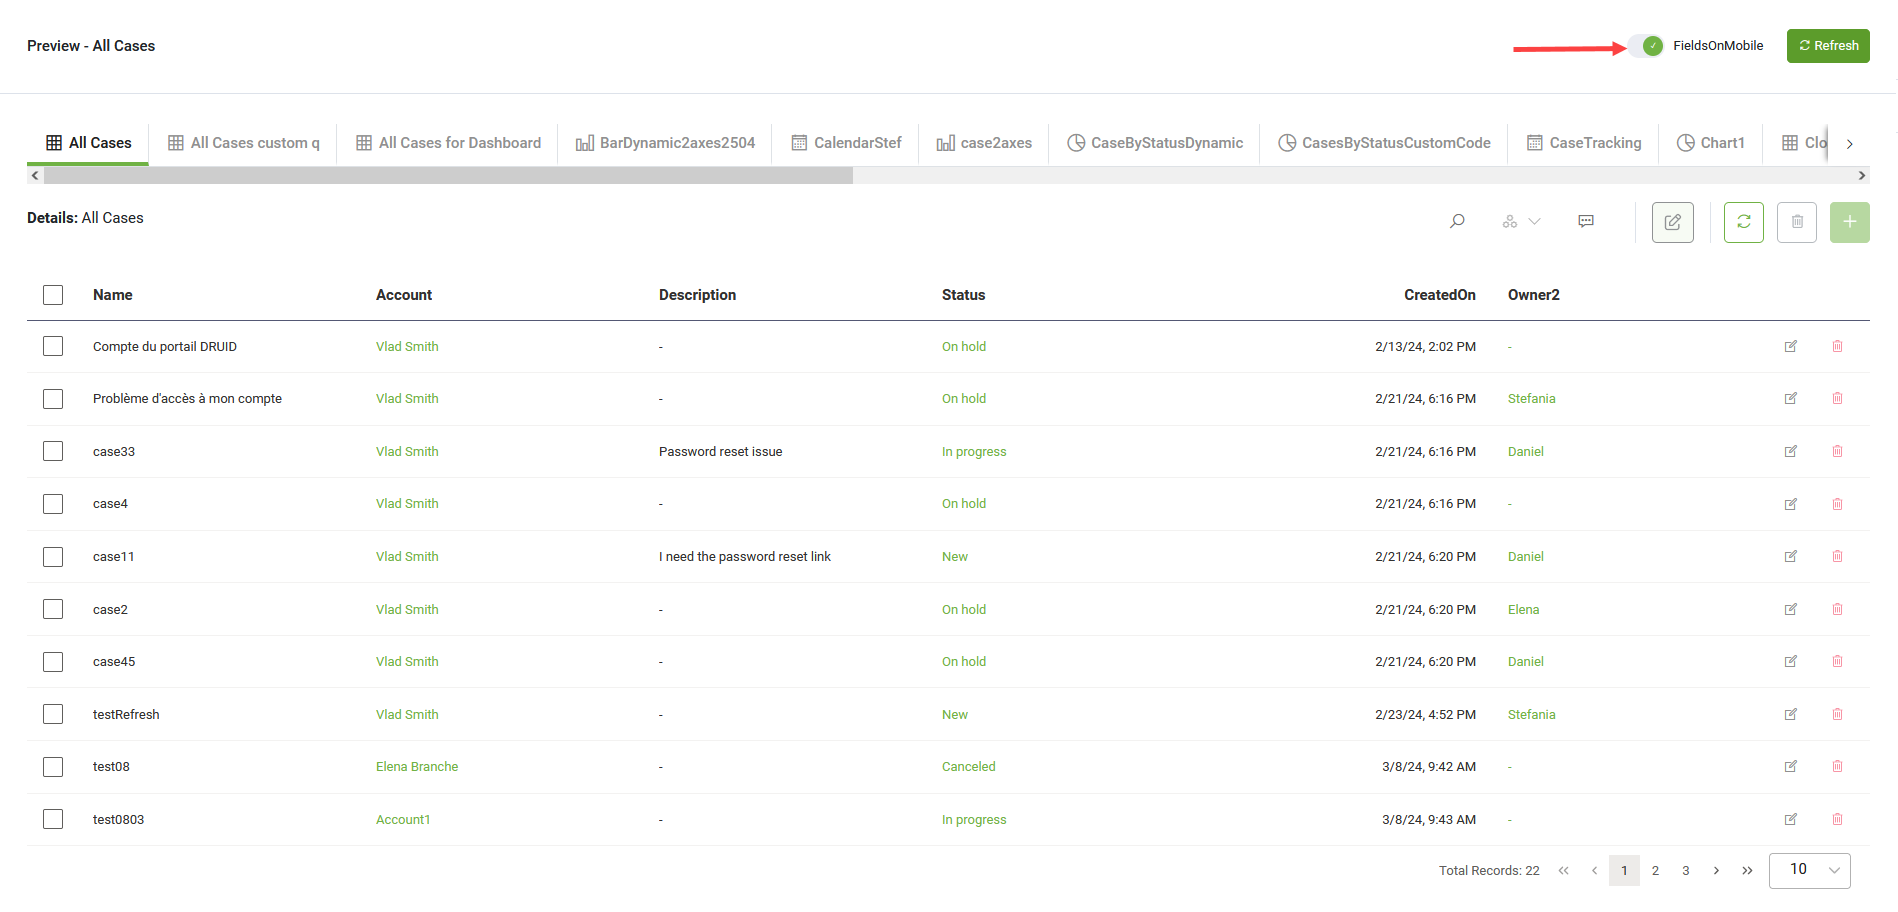
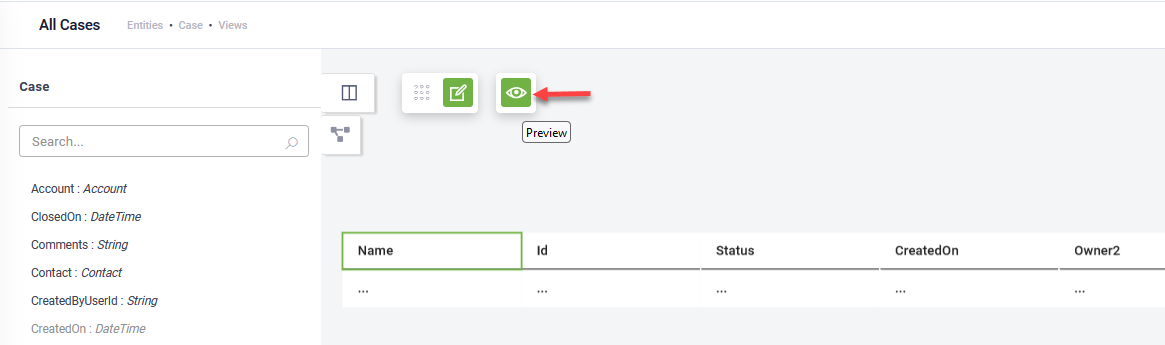
Step 5. Optionally, preview and check the view
The authors can preview a view by clicking on the Preview icon displayed at the top side of the View Diagram.
The view in preview mode opens in a new browser page.
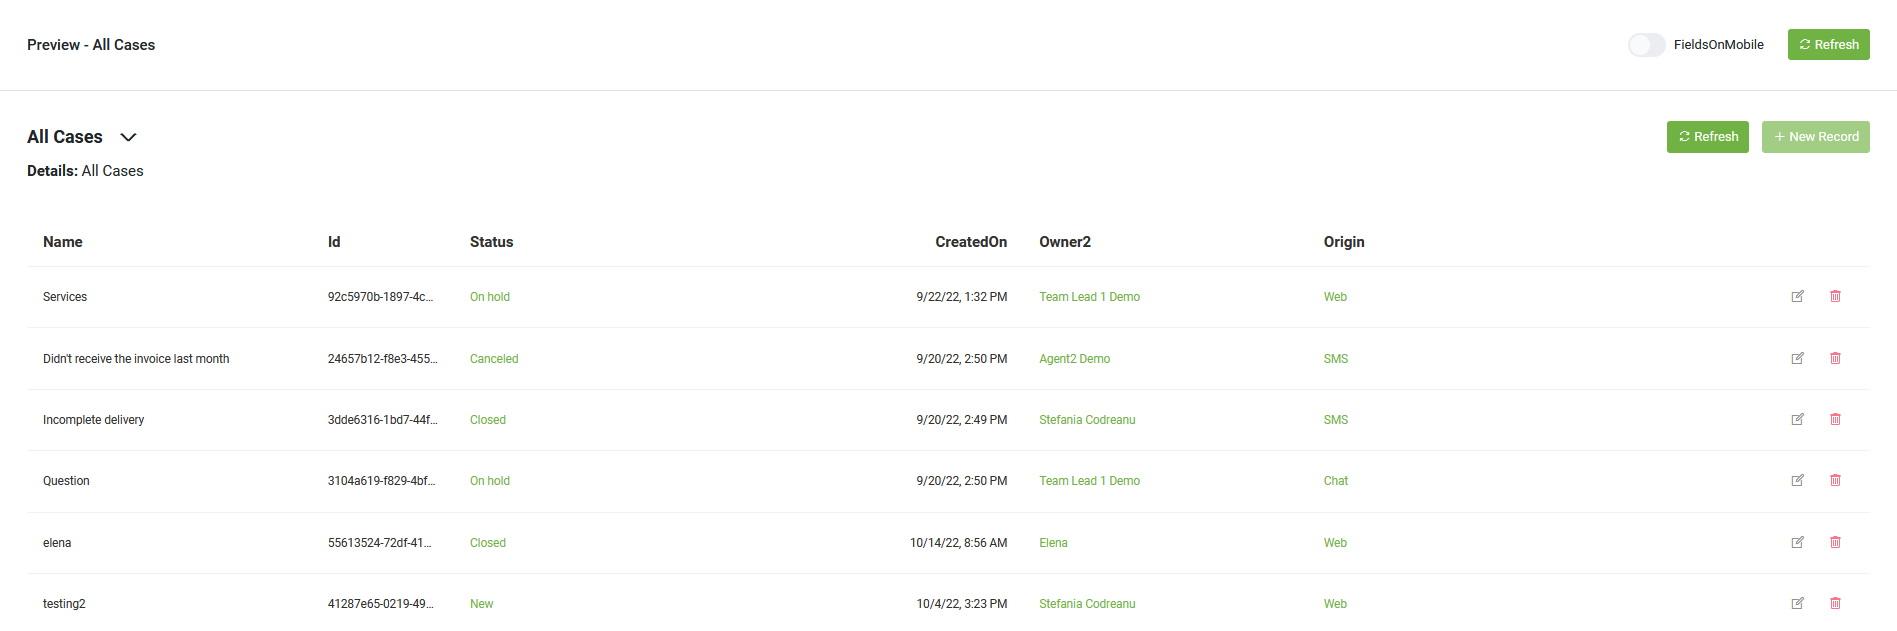
Authors can filter the view and see only the fields that are hidden on mobile devices by tapping on FieldsOnMobile the at the top-right corner of the page and then clicking Refresh.